Fat loss for 2025 brides

A Healthy Approach to Weight Loss in 2025

2025 is the year of new beginnings, and for many brides-to-be, it’s the perfect time to prioritize health and well-being. If you’re planning for your big day, there’s no better time to focus on losing weight in a sustainable, healthy way that will leave you feeling confident, radiant, and ready to walk down the aisle. But how do you stay on track in the midst of busy days and wedding planning chaos? Here’s how you can approach weight loss in a way that’s both empowering and realistic.

1. Plan Balanced Meals for Your Week

The secret to healthy weight loss isn’t about starving yourself or following a fad diet. It’s about fueling your body with the right balance of nutrients and finding consistency. By planning your meals ahead of time, you can ensure that your body gets the essential nutrients and energy  it needs without unnecessary stress or guesswork.

How to Plan Simple Balanced Meals:

  • Incorporate Lean Proteins: Think chicken, turkey, tofu, legumes, or fish. These help keep you full longer, curbing those cravings that derail your progress.

  • Fill Half Your Plate with Color: Vegetables should be the star of your plate. They're packed with fiber, which helps keep your blood sugar balanced and digestion regulated.

  • Healthy Fats are Your Friend: Avocados, olive oil, nuts, and seeds in small portions of 1-3 tablespoons— help your body absorb nutrients better and balance hormones, which can be key for weight management.

  • Smart Carbs: Include whole grains like quinoa, brown rice, and oats. These are full of fiber and help stabilize your blood sugar, keeping energy levels steady throughout the day.

Plan your meals for the week so you’re never caught scrambling for unhealthy fast food or snacking on packaged foods that don’t leave you as satisfied as more nutrient dense food options. By dedicating a little time each week to prepare meals or ingredients in advance, you can save time and ensure that healthy choices are always within reach.

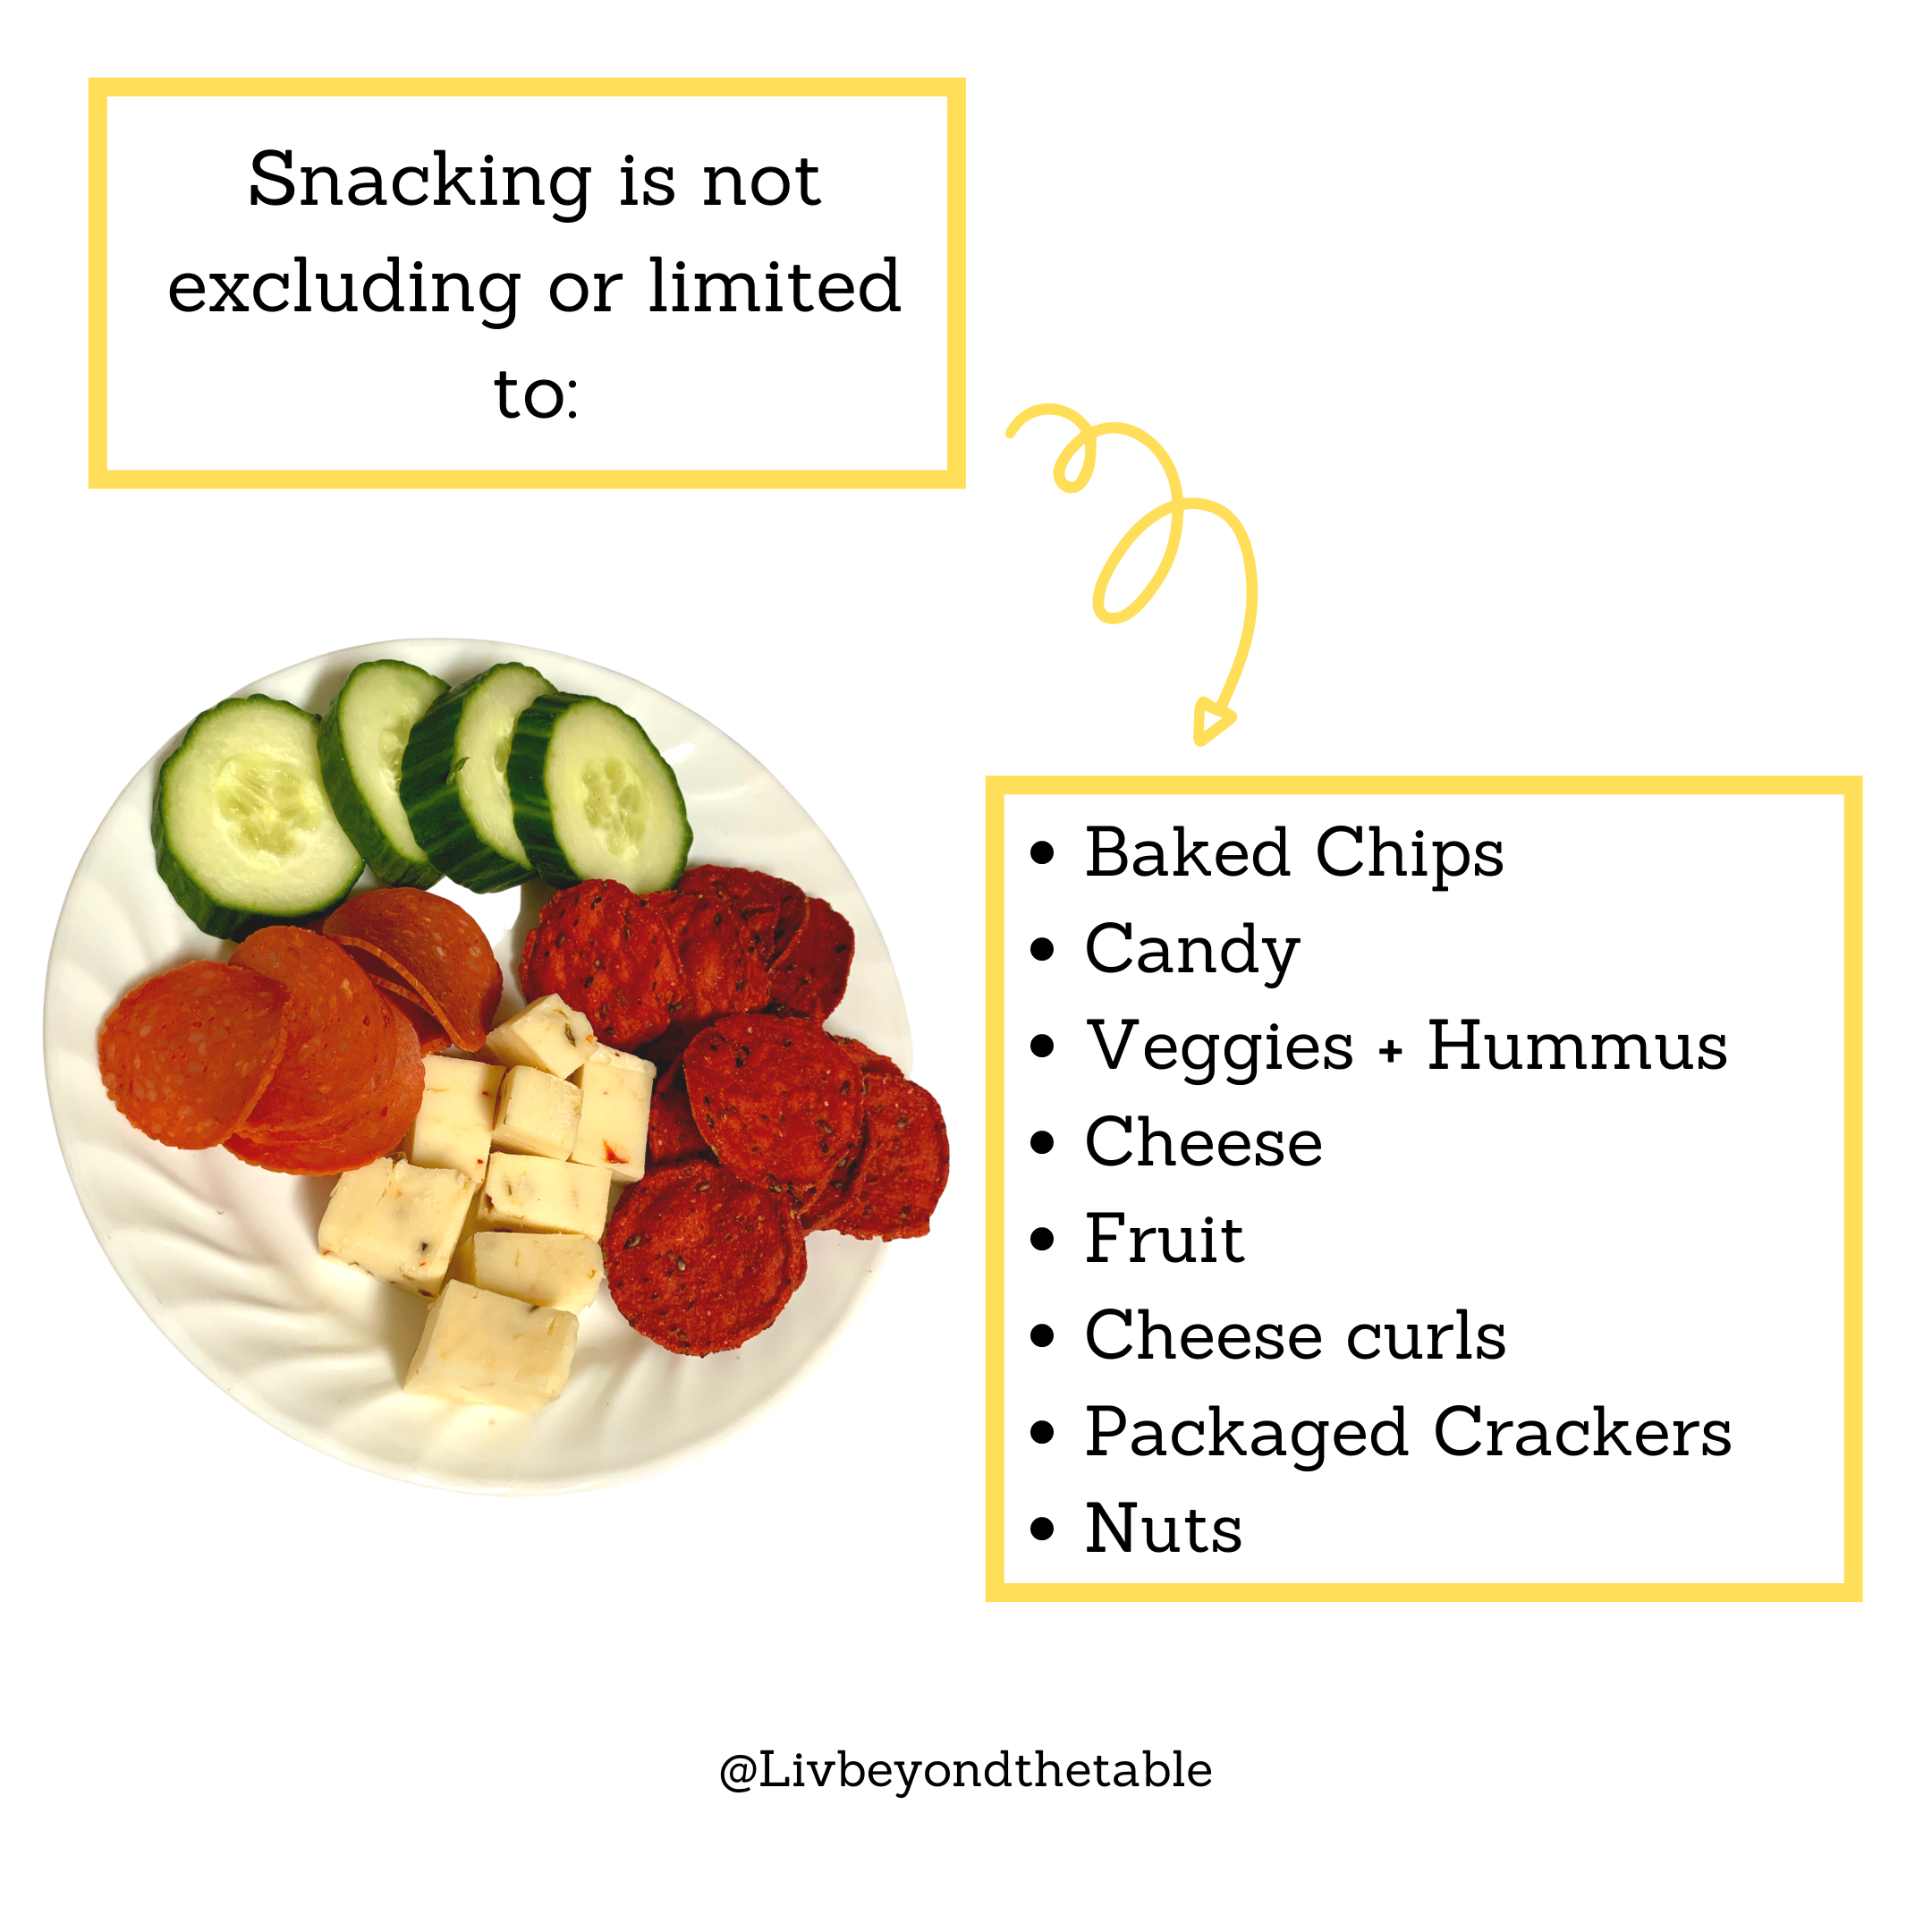
2. Keep Healthy Snacks on Hand for Busy Days

We’ve all been there—rushing from one task to the next, and suddenly hunger strikes. Instead of reaching for a bag of chips or a sugary granola bar, keep nutritious snacks on hand that can help keep your energy up and your metabolism working efficiently. The key is to snack with a purpose.

Smart Snack Ideas:

  • Greek Yogurt with Berries: Packed with protein and probiotics, this snack supports muscle repair and gut health.

  • Veggie Sticks with Hummus: A perfect combo of fiber and healthy fat to keep you full and satisfied.

  • Mixed Nuts and Popcorn: Full of heart-healthy fats and protein, nuts are a great snack that’ll keep you energized without causing a blood sugar spike. Air popped popcorn with a little salt and olive oil can provide more volume to your snack without many added calories.

  • Hard-Boiled Eggs and Fruit: A fantastic source of protein and healthy fat, perfect for a quick snack on the go. Pairing a fruit with your protein adds fiber and provides quick energy for those afternoon slumps.

Make sure your snacks are balanced, providing a mix of protein, fiber, and healthy fats. This will not only prevent hunger but also help regulate blood sugar levels, preventing energy crashes and mid-afternoon cravings. A purposeful snack in the afternoon can prevent an evening food binge.

3. Balance Your Blood Sugar with Fiber-Rich Carbs

One of the most important aspects of healthy weight loss is maintaining stable blood sugar levels. When blood sugar spikes and crashes, it can lead to hunger pangs, irritability, and cravings—often for sugary or processed foods. To prevent this rollercoaster, focus on fiber-rich carbohydrates, which help to slow the absorption of sugar into your bloodstream.

Focus on These Fiber-Rich Carbs:

  • Fruit: Whole pieces of fruit contain high water content which can help keep you hydrated while also providing fiber and other micronutrients.

  • Vegetables: The more variety of colors in your diet the better for your overall health and digestion which supports a healthy metabolism.

  • Legumes and Beans: These are rich in fiber and protein, making them an excellent choice for regulating blood sugar.

  • Whole Grains: Instead of refined grains, go for oats, quinoa, and whole wheat, which provide longer-lasting energy and prevent spikes in insulin.

When you balance fiber-rich carbs with protein and healthy fats, you ensure that your body has a steady supply of energy throughout the day, making it easier to stay on track with your weight loss goals and feel good in the process.

4. Manage Stress for Better Results

Wedding planning can be stressful, and stress can have a major impact on your health and weight loss journey. High stress levels lead to an increase in cortisol, a hormone that not only makes you feel more anxious but can also lead to weight gain, particularly around the belly area.

Ways to Manage Stress:

  • Mindful Meditation: Spend just 10-15 minutes a day sitting quietly and focusing on your breath. This can reduce stress and promote a calm, focused mindset.

  • Exercise: Whether it’s a yoga class, a walk outside, or a dance workout, regular physical activity helps lower cortisol levels and boost your mood.

  • Adequate Sleep: Quality sleep is non-negotiable for both stress management and weight loss. Aim for 7-9 hours of restful sleep each night to support your body’s natural recovery process.

  • Self-Care: Take time for yourself, whether it’s a warm bath, reading your favorite book, or getting a massage. Taking breaks will help you stay grounded and focused during the busy wedding planning process.

Managing stress isn’t just about reducing anxiety—it can actually support your physical health, improve digestion, and help keep your weight loss efforts on track.

5. The Bottom Line: A Holistic Approach to Weight Loss

As you prepare for your wedding day, remember that weight loss doesn’t have to be a stressful, restrictive process. When you focus on balanced meals, healthy snacks, fiber-rich carbs, and stress management, you’re setting yourself up for success—not just for the wedding day, but for a lifetime of healthy habits.

In order to lose weight, you do need to be in a calorie deficit which means burning more calories than you consume. As a Registered Dietitian and fitness coach, I recommend adding exercise to your weekly routine to support a bigger deficit, so you can eat enough food to support your energy levels while losing weight. If you are a bride with a short window of time before your wedding to lose weight, I also recommend tracking your food to be more accurate and aware of how much you are eating. Having specific calorie and macro goals that support your goals will help you have more success!

Remember to celebrate your body for all it does for you, and treat it with the love on this weight loss journey. By making small, sustainable changes to your routine, you can achieve your weight loss goals and feel empowered, confident, and radiant on your special day.

After all, your wedding is a celebration of love—starting with loving yourself and your journey. So, take it one step at a time, trust the process, and get ready to walk down that aisle feeling your very best!

Click the “Take Action” button on the top right hand part of your screen if you think having a coach support you on this journey would be the next best step for you to reach your goals by your wedding date!

5 herbal teas you need to start drinking

Have a tea party with your friends or yourself everyday!

Herbal teas can support your detox pathways and female hormones. You can have herbal tea in the morning, afternoon, or evening. These five different teas are my go-to when recommending options to my clients.


  • Chamomile

    • Triggers the parasympathetic nervous system to help calm you down and reduce anxiety.

    • Supports relaxation, digestion, sleep, and stress relief.

  • Green tea with ginger

    • Promotes natural energy and focus for your day.

    • Supports digestion, reduces bloating and nausea.

  • Licorice root

    • Soothes allergy flares or histamine issues from an overactive immune system.

    • Naturally calms your digestive system, sinuses, and supports throat health.

  • Dandelion tea

    • Supports your detox pathways including your liver and kidneys.

    • Reduces water retention and bloating.

  • Healthy Cycle Tea

    • Supports your wellness as a menstruating woman no matter where you are in your cycle.

    • Helpful in reducing menstrual cramps and regulating periods.

    • Contains nutrients like vitamin C + magnesium.

I recommend purchasing organic teas especially if you aren’t buying loose leaf tea blends. My favorite tea bag brand you can find in most grocery stores is called Traditional Medicinals.

My go-to sweeteners for tea are locally sourced honey, Manuka honey, or liquid monk fruit. Have fun with adding other herbs to your tea like mint or infuse it with dehydrated berries!

Do I need to eat more to lose fat?

The new trend of 2025👀⚡️💪🏼

Do I need to eat more to lose fat?

It’s called fueling your body with MORE nutrients instead of less.

When you don’t support your body with enough calories to fuel your exercise activity and basal metabolic rate, your metabolism will actually drop and you will burn fewer calories! This is an adaptive response to your body, thinking it needs

I’ve had clients who were eating much fewer calories (~1200) compared to how much they were burning in a day (~2500) and would not lose body fat. Once they added more nutrient dense foods, more fiber, more carbohydrates they actually started to lose fat.

When you exercise regularly with progressive overload in your program, WHILE eating enough nutrients to support exercise your body won’t hold on to extra fat.

It’s not as easy as calories in, calories out.

When there are gut health issues, hormonal issues, and chronic inflammation has been present for years.

Your body needs appropriate proteins, carbs, fats, total calories, and vitamins and minerals that support specific bodily functions.

Your quality of food matters.

You cannot be a healthy adult without including fruits, vegetables, and whole grains

in your diet.

Living on protein bars and protein powders is not the same as a balanced diet that includes a variety of foods.

Carbohydrates in high fiber foods support your metabolism, hormones, and digestion. Your body will use more energy to break down those foods which increases your metabolic rate. This makes you more efficient at burning calories rather than storing them.

You will improve your metabolic capacity even more when you are fueling your body appropriately while exercising regularly!

This is the long game approach to fat loss, but it’s one that doesn’t make you sacrifice fun experiences or PR’s 🎉

Mentally it can be challenging because the scale might not go down…

Let me help you lose fat while staying active and become your strongest + healthiest self 🌻

Click the “take action” button in the top right corner of your screen to work with me 1:1 to achieve your fat loss goals!

The Crispiest, Cheesiest Air Fried Broccoli

This week a have a very cheesy broccoli recipe for you! You can use it as a side to a meal or make it as a fun snack.

Before we jump into that crispy goodness, I wanted to see if any of you have been experiencing some not so great symptoms from your added vegetables? Have you been experiencing more gas, bloating, or constipation since increasing your vegetable consumption these last few weeks?

Paying attention to your digestive symptoms gives you important clues 👀into your metabolism and how your body responds to certain foods. Once I notice a symptom hanging around for 3 days or more, I start to get curious and not brush those off. If you've noticed changes in your digestive system, listen up.

There is no doubt that vegetables are full of nutrients that your body needs. However, we all know too much of anything is not a good thing.

For example, I have been encouraging everyone in this Healthy & Beyond Community to aim for 5-7 serving of vegetables per day. This is a great goal to have and will benefit your body long term, although I want to mention how to actually implement this goal without negative digestive symptoms occurring.

🌟You should slowly add 1-2 servings of vegetables in per day every 1-2 weeks until you are up to 5-7 servings total per day to allow your body to adjust. An increase in fiber and certain vegetable properties, especially in cruciferous vegetables can have your body in major digestive stress!

Cruciferous vegetables contain raffinose, a sugar that remains undigested until your gut bacteria help out. Those vegetables include: broccoli, cauliflower, kale, arugula, and cabbages.

Here are a few ways to continue eating vegetables and reduce those unwanted digestive symptoms:

  • Cook your vegetables instead of eating them raw because it breaks down their fiber and kills some of their gas producing properties.

  • Take a digestive enzyme supplement. Our stomachs contain a variety of enzymes that help digest our food. When our gut health is out of wack our stomach environment may not have the appropriate amount of enzymes to digest our food.

  • Include probiotics/naturally fermented foods into your regular diet.

Click the button at the bottom of this email if you have more questions about any of the previous information I shared!

Now let's jump into this broccoli recipe😋

cooking broccoli.jpg

Crispy Cheesy Air Fried Broccoli
Prep time: 15 minutes and Cook time: 15-20 minutes
Makes 4 servings
Nutrition info for 1 serving: 77 Calories, 5g P, 3g F, 7g C, 1g Fiber

Ingredients:

  • 1 head of broccoli

  • 1/4 cup cheese

  • 1/4 cup gluten free bread crumbs

  • 1 egg

  • 1 tsp onion powder

  • 1 tsp garlic powder

  • 1 tsp smoked paprika

Directions:

  1. Wash and cut broccoli into bit sized florets.

  2. Measure the rest of the ingredients.

  3. Place egg in a bowl and whisk it.

  4. Combine all dry ingredients(bread crumbs, seasonings, and cheese) in a separate bowl from the egg.

  5. Get a baking sheet and cover with foil. Spray olive oil onto the foiled baking sheet.

  6. Take broccoli floret to dip in egg then the dry ingredient bowl and finally place on the prepared baking sheet. Repeat this until all broccoli is coated.

  7. Once all the broccoli is coated, place baking sheet into the air fryer or standard oven. If using air fryer preheat to 325 degrees and cook for 15-20 minutes, until crispy. If using oven preheat to 400 degrees and cook for 15-20 minutes until crispy. Don’t be alarmed if steam leaves your air fryer or oven, that’s normal!

  8. Remove from heat source and let cool 😎 enjoy this recipe as a snack or a side to your meal!

crispy cheesy broccoli.jpg

Meat Extenders Explained + Lentil Burger Recipe

I know everyone hates talking about money, but today I'm going to give you a tip to help you SAVE money!

Meat, poultry, protein in general is usually the most expensive part of your meal / grocery budget.

Don't worry, I am not going to tell you all that you need to become vegetarian!😆

I am going to tell you how to make your meat go further in your meals. I've mentioned this before in some of my content, but I'm going to share it again. Allow me to introduce to something called "meat extenders."

Meat extenders are other food sources that can be prepared with your meat to help increase your total volume. For example, instead of using 1 pound of ground turkey for a meal, instead you could use a 1/2 pound of ground turkey and one of these other food sources that pairs well with your meal. Let me give you some ideas of what foods these might be...

Examples of Meat Extenders:

  • Lentils (today's recipe)

  • Beans

  • Quinoa

  • Oats

  • Mushrooms

I have some recipes saved on my Pinterest page that incorporate some of these ideas. I've done some of my own creations in the kitchen using black beans in meatballs, quinoa and black beans in tacos, chicken and lentil soups, and more.

Now you may be thinking "okay Liv that sounds great for my budget, but that's increasing my carb intakes!" You are right, it will. These are fantastic carb sources with protein and fiber that we want in our diets. They will provide lots of energy to your body, keep you full for hours, and improve your gut health!

This is your friendly reminder to NOT FEAR CARBS.

Let's get on to today's recipe, so you can try adding lentils to your diet and save money!

Lentil burger ingredients

Lentil burger ingredients

Lentil burger ingredients in the food processor. (Step 4)

Lentil burger ingredients in the food processor. (Step 4)

Lentil Burgers
Prep time: 20 minutes and Cook time: 20 minutes
Makes 5 servings
Nutrition info: 138 Calories, 9g P, 3g F, 18g C, 6g Fiber


Ingredients:

  • 1.00 cup, Green Lentils (Uncooked)

  • 1 cup, Chicken Broth Low Sodium

  • 0.50 cup shredded, Carrots

  • 2 tbsp, Tomato Paste

  • 1 cup, Italian Parsley, chopped (Raw)

  • 1 tbsp, Garlic, minced

  • 0.50 tbsp, Smoked Paprika

  • 1 tsp, Ground Cumin

  • 0.50 tsp, Spices, onion powder

  • 0.50 tsp, Ground Black Pepper

  • 0.50 tablespoon, Toasted Sesame Seed Oil

Directions:

  1. Cook the lentils with 1 cup of low sodium chicken broth in a small saucepan. You can swap chicken broth for any broth of your choosing, although I recommend using low sodium in general! Bring the broth to a boil with the lentils in the saucepan. Turn the heat down and let simmer until the broth has been soaked up by the lentils. They take about 5 minutes to cook.

  2. While the lentils are cooking you can measure the rest of your ingredients and prepare in a large mixing bowl. Buy shredded carrots to save you time. Fresh parsley adds flavor, so this would be better than the dried herb. Add only half of the amount of oil to the burger ingredients. You will save the other half for the pan to keep the burgers from sticking.

  3. Get out your food processor. Add your cooked lentils to the food processor. I used my Ninja blender, puree setting twice to get a sticky texture.

  4. Then add the rest of the ingredients to the food processor with the lentils from your large mixing bowl. Use the puree setting again or process for 2-4 minutes, until the ingredients are well combined. Stop halfway through and use a rubber spatula to make sure all the ingredients are thoroughly combined.

  5. Once you have a good burger mixture, measure out 5 equal contents of lentil burger. I used parchment paper in between my counter and the lentil mixture to stay a bit cleaner. With my 5 portions of lentil mixture I took each individual portion and formed them into burger patties.

  6. After all 5 burger patties are formed, prepare a baking sheet. I covered mine in foil to make clean up quicker. Use the rest of the sesame oil to thinly coat the foil so the burgers don’t stick to the pan. I used my Ninja air fryer setting, 315 degrees for 15 minutes. Any air fryer would work. If you bake them in your oven, I would try baking at 375 degrees for 15-20 minutes, flipping them halfway through the cook time.

  7. The edges of the burgers should be crispy. I enjoyed my burger in a low carb Mission tortilla wrap with Greek style hummus, spinach, and pico de gallo for lunch! Store in the fridge up to 1 week, if they last that long.

lentil burger.jpg

Check out more recipes on the blog and don’t forget to comment below!

Thai Chicken Wrap

A lunch you will actually want to eat all week, these Thai Chicken Wraps🤤

I think I am in grocery store heaven😇, here in Schaumburg, Illinois. Usually I go to one grocery store for my list each week, but this past weekend I went to a solid 4 stores- Amazon Fresh, Trader Joes, Costco, and Aldi. How many do you usually go to for your weekly groceries?

I hate to admit it, but I still bought most of my list at Aldi. I want to say that these other stores are "worth it" and absolutely "necessary," but they aren't in my opinion.

Aldi started carrying fresh herbs. Their produce outlasts any other produce I purchase and you can't deny the amount you save shopping there. It's also much easier to stick to my list there without buying extra random purchases.

I am working from home for another week and wanted a fresh lunch that I could look forward to everyday. I was inspired by this Pad Thai Wrap on my Pinterest, but of course made it my own.

The original recipe called for bean sprouts, which is initially what turned my 1 grocery store run into an adventure over the weekend. I wasn't mad about exploring my new area though😆

Needless to say, I did not find my bean sprouts, so I left them out of this recipe and just used a leftover kale and cabbage salad mix from Costco in my wrap.

Toasted sesame seed oil also makes this sauce recipe delicious and I highly recommend not leaving this ingredient out.

Let's jump into the recipe below!

 
Thai+chicken+wrap.jpg

Thai Chicken Wrap
Prep 10 minutes
Makes 4 servings
Nutrition info: 22g P, 18g F, 67g C, 27g Fiber


Ingredients:

  • For the sauce:

    • 2 tbsp less sodium soy sauce

    • 1/2 tsp garlic, minced

    • 1 tbsp sugar

    • 2 tbsp lime juice

    • 1 tbsp toasted sesame seed oil

  • For the wrap:

    • 2 boneless chicken breasts, cooked and shredded

    • 4 whole wheat carb balance Mission tortillas

    • 100 g cabbage and kale mix

    • 60 g matchstick carrots

    • 1/4 cup roasted peanuts

    • 1/4 cup fresh cilantro, chopped

Directions:

  1. Make sure you have your chicken cooked. I prepared mine in the crockpot to make this even easier. I seasoned it with garlic powder, herb de province, onion powder, and fresh black pepper. (Use a crockpot liner for less clean up!) Shred the chicken once it is cooked.

  2. Get a small mixing bowl to prepare your Thai sauce. Measure and add all ingredients listed above to your bowl. Whisk together and set aside.

  3. Take a large mixing bowl and add the cooked chicken, kale and cabbage mix, carrots, cilantro, and peanuts. Stir to combine well.

  4. Pour the sauce over the ingredients in the mixing bowl. Stir again, until it’s well combined.

  5. Grab 1 Mission tortilla and fill it with about a quarter of your thai chicken and veggies filling. Fold up your wrap and enjoy!

  6. Store the rest of the Thai Chicken wrap ingredients in the fridge for up to 5 days.


Thai wrap veggies.jpg

Save time by cooking your chicken in the crockpot on weekends! I put about 4 chicken breasts in the crockpot. I used 2 for this recipe and have 2 others for barbecue cheese quesadillas this week.

My menu for the week:
Breakfasts- eggs and zucchini muffins or smoothie
Lunches- Thai chicken wrap or barbecue cheese quesadilla
Dinners- ham, potatoes, and salad or kale pesto black bean pasta with broccoli and chicken

Minimalist Meal Ideas

Every weekend for the past month has been spent packing or doing some type of task related to moving. I spent all of last week eating and cooking from 2 glass containers, a fork, a spoon, an air fryer, and the microwave. Even if you aren’t planning to move, these meal ideas might come in handy!

Here are some healthy minimalistic meal ideas from what I ate for the past week:

  • Overnight oats

  • Rotisserie chicken over a bagged salad kit

  • Frozen parmesan encrusted tilapia with green beans

  • Frozen turkey burger with red potatoes

These are great ideas if you don't want to spend hours in the kitchen meal prepping this week or just want some quick dinner ideas for your air fryer.

I also hear cooking for only 1 or 2 people can be difficult and I suppose it can be if you don't like leftovers. I heated only the portion of frozen fish or turkey burger I was going to eat at that meal. My green beans and red potatoes were both frozen bags of veggies I could heat in the microwave.

This week I will share my Minimalistic Overnight Oats recipe with you.

TIP: If you don't like cold oatmeal, you can always make it the night before and warm it in the microwave for a 30 seconds to 1 minute.

CE77634B-F741-4389-B518-066E7481665E.jpg

Minimalistic Overnight Oats
Prep time: 5 minutes and Cook time: 2 hours
Makes 1 serving
Nutrition info: 35 g P, 12 g F, 47 g C, 14 g Fiber

Ingredients:

  • 1/2 cup Quick Oats

  • 1 scoop Vanilla Protein Powder (I use Muscle Feast.)

  • 1 tbsp Ground Flax Seeds

  • 1 tbsp Chia Seeds

  • 1 cup Unsweetened Vanilla Almond Milk

  • 1/2 cup Frozen Berries

Directions:

  1. Add all the ingredients to a glass jar or container.

  2. Stir to make sure all ingredients are combined well.

  3. Store in refrigerator overnight or at least 2 hours.

  4. Enjoy in the morning and stay full for hours!


You can even keep most of these ingredients on hand as back up meal options. Pantry and frozen food items don’t usually go bad for months!

Once you try some of these meal ideas or the recipe, leave a comment below or share it to your Pinterest!

Basic Healthy Meal Recipe

Are you over complicating meal planning? Do you have a system in place for planning healthy meals?

Here is my advice on how to simplify your meals while making sure they are healthy balanced meals every time:

  • Stick to whole foods. (I'm not talking about the store) Select foods like plain rice, raw chicken breast, unseasoned vegetables, and olive oil. These foods are easy to track if you are measuring your food for a food diary. They are also easily digested by your body. Processed, precooked, packaged foods with preservatives, sodium, et. all affect our digestive system that could increase bloating, increase inflammation, and alter gut health.

  • Balance portions appropriately. It doesn't matter what portion your husband is eating, your child, or your best friend that's the same size as you. You are allowed to pick your portions based solely on your level of hunger and your health goals. For general healthy eating, make 1/4 plate protein, 1/4 of your plate starch or grain, and half of your plate vegetables.

  • Keep flavor simple. This is the most important part. Our food needs to have flavor to continue wanting to eat healthy. Add some new spices to your cabinet. Get some fresh herbs. Buy infused olive oil and vinegars. Make your own homemade sauce. Sprinkle some cheese on top. Swapping out your flavor combinations with similar foods can make it seem like a whole new dish.

Basic healthy recipe formula = 2 + cups of veggies, 3 + oz of protein, 1-2+ Tbsp of healthy fats all depending on  YOUR nutrition needs.

Basic healthy recipe formula = 2 + cups of veggies, 3 + oz of protein, 1-2+ Tbsp of healthy fats all depending on YOUR nutrition needs.

Basic Healthy Meal Formula
Prep time varies and Cook time varies
Nutrition info: Lean Protein, Fiber Rich Carb, Healthy Fat source


Ingredients:

  • Lean Protein options- Boneless Skinless Chicken Breasts, Ground Turkey / Chicken, Tuna, Shrimp

  • Fiber Rich Carb options- Brown Rice, Sweet Potatoes, Corn, Peas, Beans, Quinoa

  • Non-Starchy Vegetable options- Broccoli, Green Beans, Leafy Greens, Cauliflower, Bell Peppers

  • Healthy Fat options- Olive Oil, Low-Fat Dressing, Avocado / Guacamole, Nuts / Seeds

Directions:

  1. Cook protein as desired.

  2. Prepare fiber rich carb as desired.

  3. Flavor vegetables and prepared carb and protein sources.

  4. Pick your portions appropriately and voila!


There are a variety of meals you can create using this Basic Healthy Meal Formula. Pick all your favorite foods and actually enjoy what you are eating everyday!

Don't overwhelm yourself by thinking you need to incorporate this formula into every meal this week right away. I am always going to encourage you to make realistic habit changes you can be consistent with! For example, start by incorporating this formula into 1 planned meal this week and reply here to let me know how it went😉

Meet us in the Healthy and Beyond Facebook Group every Monday night at 7:30pm EST to learn from Liv LIVE about various nutrition, exercise, mindset, and more health topics!

Crockpot Pepper Chili Recipe

Crockpot recipes are great for when you have lots to do and don't want to spend lots of time cooking. They can even be used for lazy meal prep for the week.

I find many crockpot recipes on Pinterest that are loaded with sodium and fats, which can make a dish slightly less healthy depending on the ingredients. If you check out my Pinterest page you can rest assured all the recipes are dietitian approved for the general healthy person! If you have a specific health condition and want me to make a board for you, let me know.

Chili is definitely one of those recipes that can get unhealthy really quickly depending on your ingredients. Here are some of my healthy recommendations for your Chili ingredients:

  • Make your own seasoning blend! (I used this one with my own spices.)

  • Choose low sodium or no salt added canned tomatoes, beans, etc.

  • Dry beans are also a good option!

  • Raw vegetables - peppers, onion, tomatoes are great ways to add vitamins and minerals.

  • Swap sour cream for plain Greek yogurt as a topping.

  • Choose low fat dairy products for toppings.

  • Use small amounts of quality olive or avocado oil when cooking.

  • Swap beef for a lean beef or ground poultry.

Scroll down for my Crockpot Chili Recipe!

crockpot+chili.jpg

Crockpot Pepper Chili
Prep Time: 15 minutes and Cook Time: 3 hours
Makes 6 servings
Nutrition info for 1 serving: 330 calories, 26 g P, 6 g F, 42 g C, 12 g Fiber


Ingredients:

  • 1 pound Ground Chicken

  • 1 can diced tomatoes with basil, garlic, and oregano

  • 1 can chili beans

  • 1 can low sodium kidney beans, drained and rinsed

  • 1 can low sodium black beans, drained and rinsed

  • 1 orange bell pepper, diced

  • 1 green bell pepper, diced

  • 2 jalapeños, diced

  • 1 cup low sodium chicken broth

  • 1 cup yellow onion, chopped

  • Chili seasonings (Pinterest chili seasoning recipe above)

Directions:

  1. Place a large skillet on your stove top and turn on the heat to medium. Pour about 1 tablespoon of olive oil or avocado oil in the skillet.

  2. Add 1 pound of raw ground chicken to the skillet. You can use a different lean protein source of your choice. Break apart the meat with rubber or wooden spatula until meat is fully cooked.

  3. Turn on crockpot to high heat. I like to use plastic crockpot liners to save time cleaning. Add all the above ingredients and seasonings. Add cooked ground chicken. Stir to combine all ingredients together.

  4. Put the crockpot lid on top. Leave the crockpot on high heat for 3 hours.

  5. Stir and turn heat on low after 3 hours. Or remove chili contents from crockpot and refrigerate leftovers for up to one week. Can be stored in the freezer for 1-2 months.

Every week on Monday evenings at 7:30 EST I go live in my Healthy & Beyond Facebook Group to share healthy tips about movement, nutrition, habits, weight loss, mindset, and more!

Healthy Go-To Breakfast Ideas

Today I am giving you my healthy go-to breakfast ideas for busy mornings that will keep you full for hours.

1. Oatmeal

Make it the night before and keep refrigerated to grab going out the door. Or take a packet of Umpqua oats with you to make at work. This is my current favorite brand of instant oatmeal because it is not high in added sugars.

Adding the right mix-ins to your oatmeal can increase protein and fiber! Try some- ground flax, chia seeds, berries, nut/seed butter, and others like these to level up your morning oatmeal.

2. Smoothie

A quick blend of nutrient packed ingredients can help you get a jump start on your nutrition goals. My Pinterest page has some delicious smoothie recipes!

The biggest mistake I see with smoothies is too many carbs and not enough protein. Depending on your nutrition goals 1/2 cup to 1 cup of fruit will be enough for most people. Add foods like- oats, flax seeds, protein powder, yogurt, or spinach for added nutrients!

3. Yogurt & toppings

Greek yogurt has the most protein content, so that is usually my go-to choice. However, all yogurt will provide gut health benefits, so choose the yogurt you enjoy best!

Add toppings that are rich in fiber to balance out your nutrients. I like to add low-fat granola, pumpkin seeds, berries, or even cereal!

4. Avocado toast with hard boiled egg

All bread is not created equal! Again make a choice that will align with your goals. Typically a bread made with whole grains and limited ingredients is best for overall health.

A whole avocado can pack quite a few calories, so I recommend 1/4 to 1/2 an avocado being an adequate serving for most people. Mash it on your toast. Slice 1-2 hard boiled eggs and place them on top of your toast. Don't forget your Everything But the Bagel Seasoning for optimal satisfaction!

5. Breakfast sandwich (TODAY'S RECIPE)

It takes a little bit of prep work, but it makes breakfast a breeze in the mornings. In this recipe I added diced peppers and turkey sausage patties, but feel free to create your own version!

I like to use Thomas 100 Calorie Multigrain English muffins for my breakfast sandwiches, but you could use any wrap or bread of choice! Scroll down to check out the recipe!

me with breakfast sandwich.jpg

Breakfast Sandwich
Prep time: 30 minutes and Cook time: 2 minutes
Nutrition info for 1 sandwich: 18 g P, 10 g F, 27 g C, 8 g Fiber

Ingredients:

  • 6 Eggs, whisked

  • 6 Jimmy Dean Turkey Patty(s)

  • 2 Jalapeño Peppers, diced

  • 1 Bell Pepper, diced

  • 6 Multigrain Thomas English Muffin

Directions:

  1. Prep the Breakfast casserole the night before. Preheat the oven to 350 degrees. Use cooking spray to lightly grease the casserole dish. Whisk 6 eggs in the casserole dish. Dice fresh vegetables or chopped veggies leftover from last week’s groceries. Add the veggies into the casserole dish with the eggs. Place 6 turkey sausage patties in the casserole dish. Bake in the oven for 30 minutes, until fully cooked. Remove casserole dish and slice into 6 equal portions.

  2. In the morning, place 1 english muffin in the toaster oven for desired time.

  3. Remove 1 slice of breakfast casserole and microwave for 1 minute.

  4. Take toasted english muffin and place heated egg casserole in it to enjoy like a sandwich! Top with your favorite breakfast sandwich condiments or cheese.

cooked+egg+casserole.jpg

No reason to skip breakfast tomorrow! You now have 5 ideas to prepare even on busy mornings.

Reply now with which option you are going to try this week!

Don't forget the sauce!

People often forget this when counting calories.

The sauce!

I am talking about all those yummy condiments you add to your foods for flavor.

Aioli, dressing, mayo, sour cream, barbecue, guacamole, tartar sauce, butter, cream cheese, peanut butter, syrup, hummus, etc.

There are lots of condiments to choose from and they all have calories that should be considered when tracking food accurately.

We should also be aware of the quality of ingredients that are being used in those condiments as well. My go-to questions are "can you pronounce every ingredient listed?" and "do you know what that food is?"

Major nutrients to be aware of, Trans Fats, Sodium, Added sugars, Food dyes, GMO produced oils, and High Fructose Corn Syrup.

Here are a few healthy tips for condiments:

  • Check the serving size on the food label

  • Measure the amount you use

  • Make a swap for a condiment with better quality ingredients

  • Find a lower calorie alternative

  • Use a healthy recipe to make your own version at home to have more control over he ingredients

Lucky for you, I am including another healthy sauce recipe to level up your boring chicken this week!

Ingredients for Korean BBQ Sauce

Ingredients for Korean BBQ Sauce

Korean BBQ Sauce
Prep 5 Minutes, Makes 6 Servings
Nutrition info for 1 serving: 104 calories 3 g P, 5g F, 12 g C

Ingredients:

  • 1/2 cup low sodium soy sauce

  • 1 Tbsp brown sugar

  • 4 Tbsp rice vinegar

  • 2 Tbsp sesame oil

  • 0.5 Tbsp siracha chili sause (use 1-2 Tbsp for more heat)

  • 1 Tbsp minced garlic

  • 1 Tbsp gluten free brown rice flour (to thicken)

Directions:

  1. Measure all ingredients.

  2. Add ingredients to a small sauce pan. Whisk together.

  3. Heat and allow sauce to simmer. Add to chicken or vegetables to flavor food with Korean BBQ sauce.

korean+bbq+ingredients.jpg

Comment below with your favorite sauces or condiments! I will use some of these ideas to come up with healthy recipes in the future that you all will be sure to love.

Indian Style Dish for Winter Meal

This is a combination of a few Indian recipes I found on Pinterest all rolled into one and I must say it turned out pretty tasty!!

If you don’t follow me yet on Pinterest, you can head there now for more healthy recipes like this one.

These winter days have been keeping us on our toes! My heart goes out to all the people in Texas who have been without water, heat, and access to everyday needs/activities this past week💔I can’t imagine the surprise and fear that may have overwhelmed them.

If you like curry…this is for you.

If you like your food saucy…this is for you.

If you like Tikki Masala…this is for you.

If you like Naan…this is for you.

If you like to eat healthy dishes with quality ingredients…this if for you.

Don’t shy away from all the steps and ingredients in these two recipes below. They are worth it, but plan to enjoy your time in the kitchen with a good podcast, your dance moves or a sous chef to help!

Tikki masala.jpg

Tikki Masala
Prep:15 minutes and Cook: 30 minutes
Recipe makes 5 servings
Nutrition info for 1 serving: 310 Calories, 33 g P, 23 g F, 22 g C, 6 g Fiber

Ingredients:

  • For the Roasted Chickpeas

    • 1 can chickpeas, drained and rinsed

    • 2-3 garlic cloves finely minced

    • 1/2" ginger finely minced

    • 3/4 tsp garam masala

    • 1/2 tsp chili powder

    • 1 tbsp lemon juice

    • 1/2 tbsp oil

  • 1 small onion cut in 8 pieces

  • 2 boneless skinless chicken breasts, cut into bite-sized pieces

  • 1 can diced tomatoes, drained

  • 2 red bell peppers, washed and thinly sliced

  • 1 can full fat coconut milk

  • 2-3 garlic cloves finely minced

  • 1/4 tsp ground ginger

  • 1/4 cup raw cashews, chopped

  • 1 tsp cumin powder

  • 1 1/2 tsp coriander powder

  • 2 tsp oil

  • 1/2 tsp chili powder

  • 1 tsp garam masala

  • 1/2 tsp cumin

  • 1/2 tsp paprika

Directions:

  1. Preheat oven to 400 degrees.

  2. In a medium-sized bowl add all ingredients listed under “Roasted Chickpeas” above. Spread it evenly on a nonstick baking tray.

  3. Bake the chickpeas in preheated oven for 10 min. Using a spatula stir them and again continue baking for 10 more min.

  4. Meanwhile, heat 1 tsp oil in a large frying pan or skillet. Add whole garlic cloves, ginger, and onion. Cook the onion until translucent for 2-3 min.

  5. Add chicken to the pan and cook for 5-7 minutes, making sure all sides of the chicken are being cooked.

  6. Then add tomatoes, red bell peppers, coconut milk, and cashews. Cook them until tomato softens and gives sauce like consistency for about 4-5 min.

  7. Add the remaining spices and fully roasted chickpeas to the pan. Turn heat down and let simmer for 5 minutes.

The best part of the meal to help you soak up all the sauce🤤

The best part of the meal to help you soak up all the sauce🤤

Garlic Naan
Prep: 10 minutes and Cook: 20 minutes
Recipe makes 4 servings
Nutrition info for 1 Naan: 300 Calories, 9 g P, 8 g F, 48 g C, 2 g Fiber

Ingredients:

  • 300 grams Self rising flour

  • 225 grams Plain nonfat yogurt

  • 1 Tbsp Herb de provence

  • 1 Tbsp Butter infused olive oil (look for this at your local oil / vinegar store!)

  • 1 Tbsp minced garlic

Directions:

  1. In a large mixing bowl, measure out equal parts (225 grams) yogurt and flour. Mix until well combined.

  2. Add in herb de provence to the flour mixture. Roll into one large dough ball. You may need to add a little flour until it is not sticky.

  3. Divide the large dough ball into 4 smaller equal dough balls. I used a food scale for this step. I set the large dough ball on it and divided the number by 4 until each ball was equal.

  4. Use an cast iron skillet on medium-low heat. Add oil to the pan.

  5. Take one of the small dough balls and flatten it into the pan. Cook first side for 3 minutes. Add small amount of the minced garlic to the pan and flip the naan dough onto the garlic to cook the other side of the naan.

  6. Remove naan from heat when fully cooked and set aside. Repeat step 5 for the remaining three small dough balls to cook them into garlic naan bread.


Enjoy this Indian dish on a cold day! The leftovers make great meal prep for a few more meals throughout the week. This is a well balanced meal full of protein, fiber, and variety of healthy fats.

A New Kind of Waffle for Breakfast!

Here is a new kind of waffle for you to add to your breakfast options. It's a quick meal to throw together and is sure to keep you satisfied until lunch!

Even try it as a breakfast for dinner recipe tonight if you want😉

I am definitely keeping this recipe in mind for those days when the groceries are slim because I almost always have these ingredients stocked. Do you have recipes or meals like that?

If not, I highly recommend coming up with 2-3 meal ideas that require few ingredients that are either all shelf stable or don't go bad quickly in the fridge.

You probably shifted your thinking towards this when we first shutdown for COVID last year, but even with unexpected storms or changes these days; it's good to be prepared.

basic chaffle and jam.jpg

Basic Chaffle 🧇 + Berry Chia 🍓 Jam
Prep time: 5 minutes and Cook time: 5-10 minutes
Nutrition info for 2 waffles and 1/4 cup jam: 33 g P, 30 g F, 30 g C, 7 g Fiber

Ingredients:

  • 2 eggs

  • 1/2 cup low fat Italian blend shredded cheese

  • 2 Tbsp almond flour (or another flour)

  • 1 cup frozen berry blend

  • 2 Tbsp chia seeds

Directions:

  1. Preheat waffle iron.

  2. Use small saucepan on stove for the berry jam. Place on low heat. Add frozen berries to the saucepan. Let cook for 3-5 minutes.

  3. In a medium bowl, whisk together 2 eggs. Stir in shredded cheese and almond flour until well combined.

  4. Spray/ grease heated waffle iron. Pour egg mixture into the waffle iron. This recipe makes 2 waffles, so depending on if your waffle iron is small you may need to only pour half the mixture and cook 2 waffles separately. Waffles should only take about 5 minutes to cook.

  5. Once the berries start getting soft. Use spatula to smash most of the berries. Let simmer for 1-2 minutes.

  6. Stir chia seeds into the cooked berries. Let simmer for 1-2 minutes. Then remove from heat and let cool. Stirring occasionally.

  7. When the waffles are fully cooked. Put them on a plate and top with the berry chia jam. I used about 1/4 cup and noted that in the nutritional info. Enjoy while everything is still warm!

Store leftover berry chia jam in a jar for more waffles later in the week. Or if you love PB&J sandwiches like I do, then this will be a great addition without any added sugars!

Store leftover berry chia jam in a jar for more waffles later in the week. Or if you love PB&J sandwiches like I do, then this will be a great addition without any added sugars!

PB&J sandwiches are not just for kids! They aren't something you have to restrict from your diet if you are trying to eat healthier either.

🥪Bread isn't bad.

🥪Carbs aren't bad.

🥪You can eat a sandwich.

I am including a PB&J sandwich as my afternoon snack this week! I'm all about using up the ingredients I buy in multiple recipes. I hate wasting food, but I also like variety.

Meal planning is a skill and I find it is one that I continue to perfect with each week!

My PB&J sandwich is about 350 calories total. Providing enjoyment and satisfaction to control my hunger mid day😋

What meals/snacks did you plan for the week? Let me know in the comments!

Healthy Snacking Basics

I want to help you improve your snacking habits this week!

One of the first things I hear chronic dieters say to me is, "I'm trying to snack less often." I know what they mean, but my first reaction is always to help them re-frame what snacking looks like.

Often when we think of snacking, we associate it with the habit of mindlessly eating processed foods. Choosing foods like potato chips, candy, crackers, cookies, fruit snacks, and more.

The key phrase being the mindlessly eating part! Healthy snacks start with mindfulness. Preparing convenient foods to eat to control our hunger throughout the day until we eat our next meal, is a habit we should all aim to include in a healthy lifestyle.

You don't need to stop snacking to be healthier.
You need to start snacking mindfully.

snacking.PNG

Snack plates or packing a variety of foods for the day can help meet your nutritional needs and taste preferences at the same time!

The key points I want to make when it comes to healthy snacking habits are:

  • Pair protein + fiber rich carbs together

  • Eat with awareness of your environment, emotional status, and hunger level

  • Choose foods that you enjoy

  • Prepare foods in advance to make the "healthy" option, the most convenient option

  • Make decisions around snacking that are aligned with your goals

The following are ideas and pictures of snacks I enjoy! Feel free to get creative and make your own combinations with foods you love.

I hope these snacking tips help you let go of Diet Culture's view of snacking and give you the freedom to honor your body's hunger throughout the day. If you want more ideas and recipes, check out my Pinterest board for snacking!

Save $100 on Food This Week

Grocery shopping is evolving with new ways to shop and receive weekly groceries without ever stepping foot in the store. Are these new trends saving you money or costing you even more?

The first thing to do whether you are shopping online or physically going to the store is to plan your meals for the upcoming week. Browse the sales and seasonal produce to help you decide what foods to incorporate. From those meals and recipes you can begin to make a list of the food items you will need. Shopping online for groceries can help you avoid spending time in aisles you did not need to be in and buying items on impulse. However if you fail to plan for either shopping experience you may end up making unnecessary purchases.

Take inventory of what ingredients you already have, so you only get what you need. Mark down ingredients that you are low on in case you find a sale on those items even if you have enough for the meals you are preparing for the week. Organize your list into items you need separated from the items your family may need. This organization with help to avoid those impulse purchases.

Now that you are ready to shop, here are a few tips to keep in mind:

● Limit convenience items when possible

● Shop on a full stomach

● Purchase dry foods or pantry items in larger quantities

These few steps take a little bit of time, but are worth all the money you will save! It is possible to eat healthy even on a budget. Take a look at the table below to see how exactly a family of 4 can save $100 in a week by preparing more meals at home.


Screen Shot 2020-11-18 at 4.03.52 AM.png

Use these meal ideas to plan your next budget friendly shopping list! Comment on the blog and let me know how this goes.